In practice we still regularly receive PDFs with a great many anchor points. Raster image processors keep getting more powerful, but such files still cause a lot of delay in the RIP — 'out of memory' messages are not uncommon. We lend a hand by pre-rendering the PDF.
Every RIP converts vectors to pixels. However long you keep them intact, at some point the PDF must be translated into a plate per colour. Large-format printheads are also driven by image information (plotters excepted). Cutting machines, by contrast, do use vector data; RIPs that also drive cutters know which data must remain vectorised.
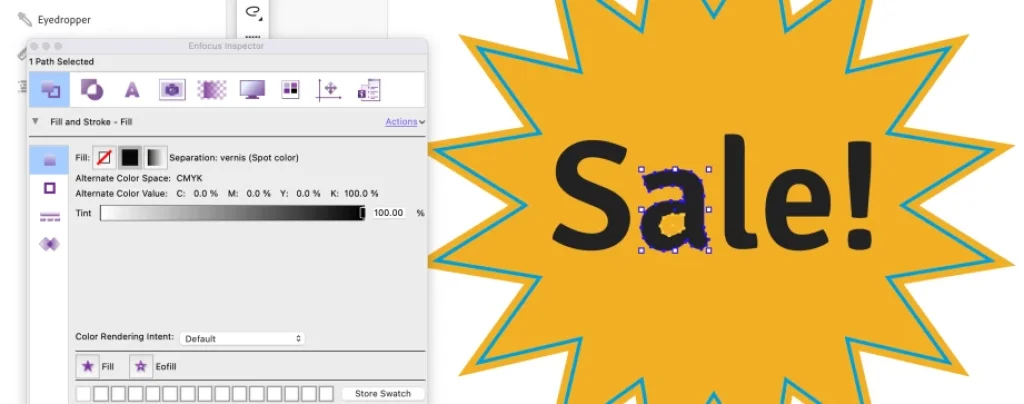
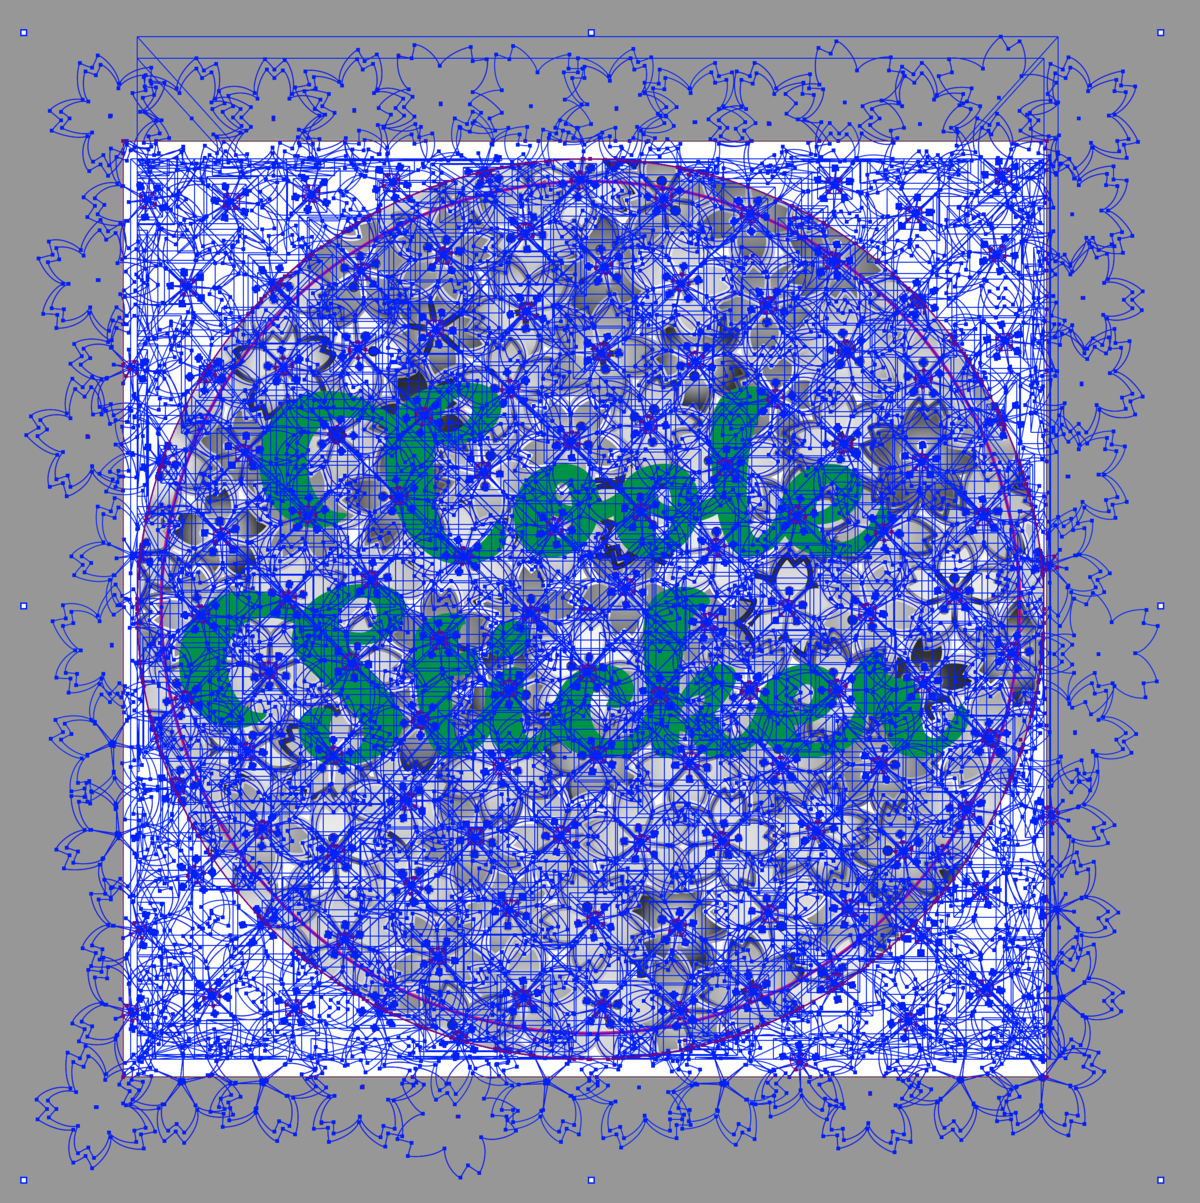
Rasterising a sticker with spot colours
This sticker has a vector basis where the cutting line is defined by a technical spot colour, 'Kiss-cut'. If we simply rasterise the whole sticker, we lose that spot colour — an image consists only of RGB, CMYK or grey pixels. So we exclude spot colours and text.
Steps 1 & 2: Action and selection
Create a new Action in PitStop Pro, for example 'Pre-raster'. First choose 'Select all' to select the whole PDF, and add 'Select all spot colors', because we do not want to rasterise spot colours.
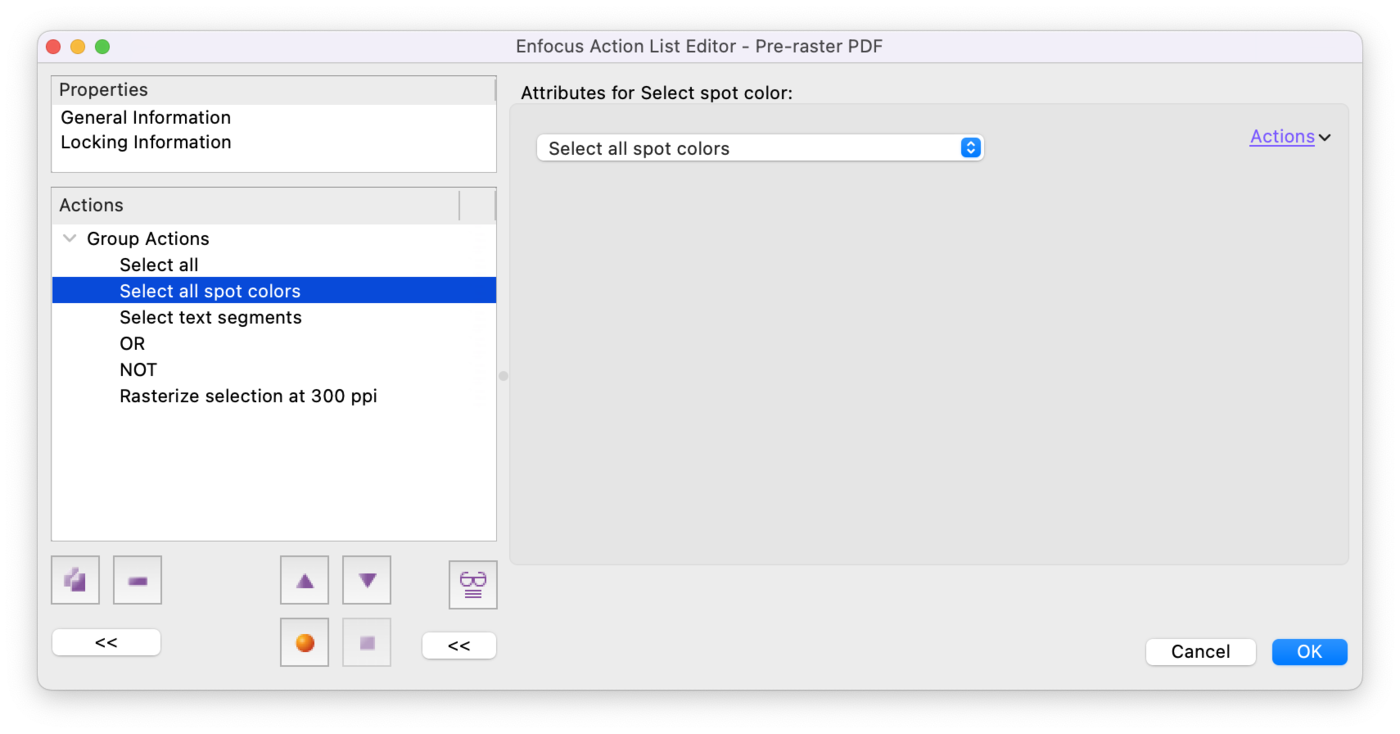
Step 3: Exclude text
Add 'Select text segments'. Note: text that has already been vectorised (converted to outlines) is no longer recognised as text.
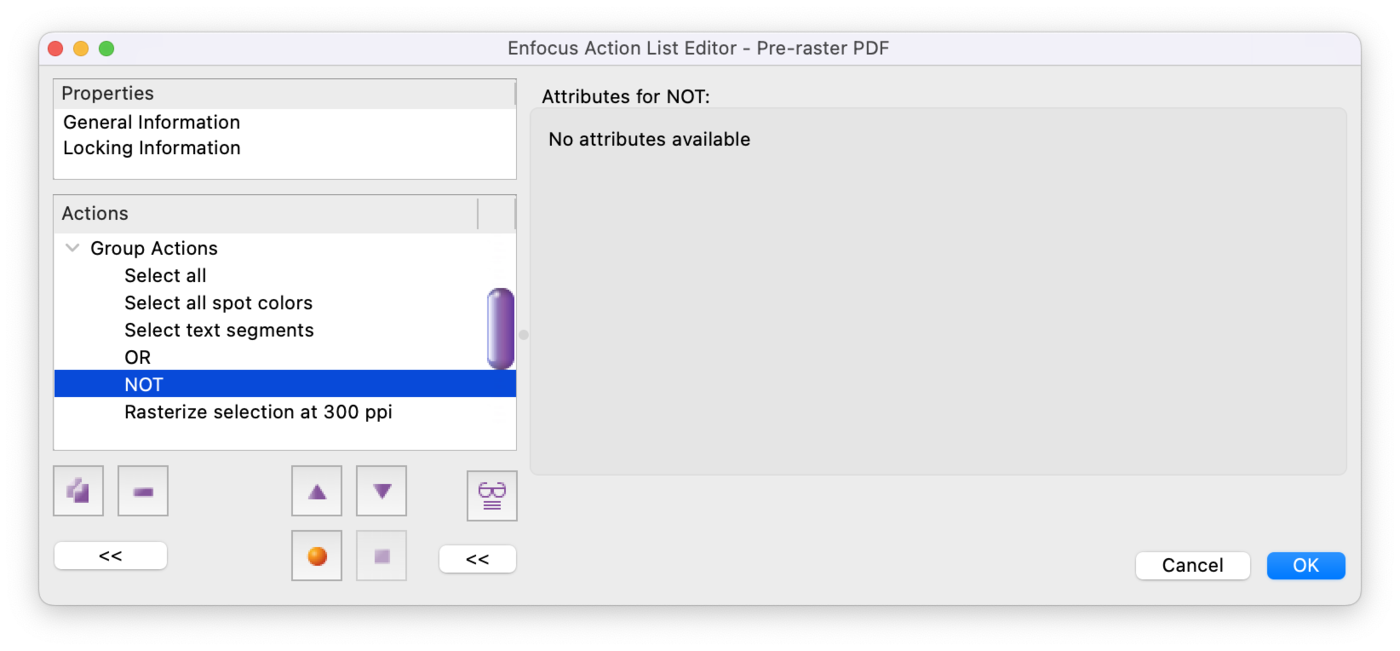
Steps 4 & 5: The OR and NOT operators
With the 'OR' operator we select spot colours and text (in software, 'AND' works differently than in everyday speech). The 'NOT' operator then excludes that preceding selection, leaving only the content to be rasterised.
Step 6: Rasterise
The final step, 'Rasterize selection at … dpi', rasterises the selection to pixels. Choose a high-quality JPEG compression here and change as little as possible that would alter the appearance.
Recap
So we have an action that (1) selects the whole PDF, (2) excludes text and spot colours and (3) rasterises the rest to pixels. Extendable to higher resolutions, text to outlines, or keeping only 'Kiss-cut' and 'Thru-cut' and converting the rest to CMYK.
There is a big bonus!
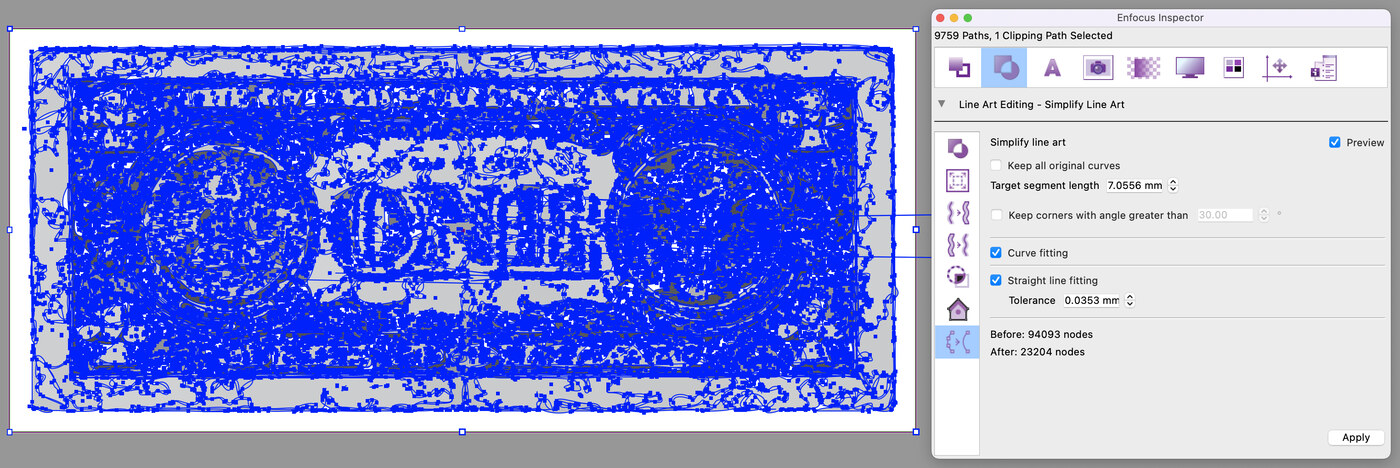
The sticker contained 1190 paths, 2781 clip masks and 1314 shadings, reduced to 1 path, 2 clip masks and 1 image. Nested on a single A0 sheet (±117-up) it would otherwise produce ±140,000 paths, 325,000 clip masks and 154,000 shadings. That is an enormous amount.
Conclusion
A PDF with many vectors may yield compact files, but it heavily burdens the RIP. Prefer a file that is slightly larger in MB but rasterises much faster. File size is not always the deciding factor.