What is JDF?
JDF stands for Job Definition Format: an XML-based technical standard in the graphic arts industry. Its purpose is to transfer complex job ticket and print instructions between software and hardware. It describes attributes of print jobs such as size, paper type, colour specifications and finishing processes, so that all equipment and software involved process the job consistently.
JDF acts as a bridge between different systems and helps automate the production workflow, reducing manual errors and inefficiencies — provided it is set up properly, of course.
In practice
In practice it is not that "simple". Parties often claim to have "standard JDF integrations" and that a connection is a piece of cake. But there is no standard: yes, a JDF specification exists, but not everyone follows it. All sorts of "flavours" have emerged. The ways to describe print media, submit cutting data or define impositions can differ considerably.
JMF
In the following steps the term JMF also appears: Job Messaging Format. It is comparable to a short message back and forth ("How much is left?" / "Please add one more").
Step 1: Configure the PRISMAsync
We choose a Canon printer; it has the most extensive JDF support in Switch. Log in to the PRISMAsync controller, go to Configuration > Connectivity and enable JMF support. By default we choose port 8010; JMF communicates over this port.
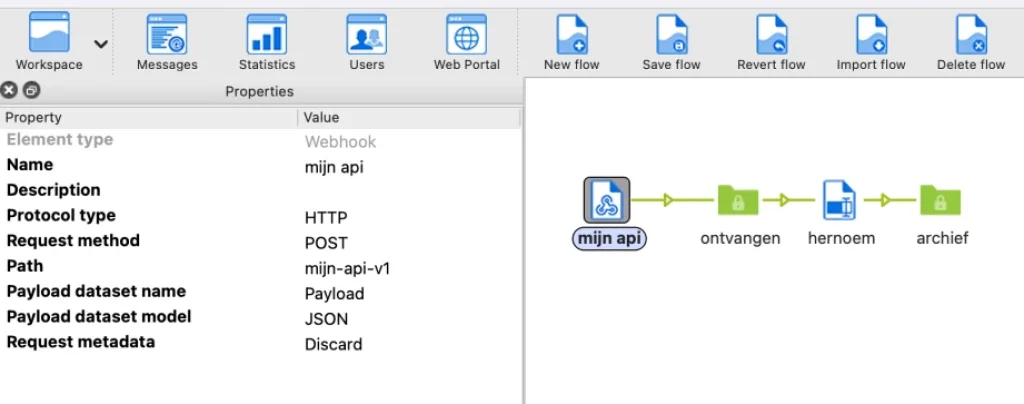
Step 2: New workflow
Create a new workflow and install the free Canon Apps from the Enfocus AppStore. Create a hotfolder named "Canon_SRA3_DZ_FC". When a PDF lands in this folder, we want it printed on SRA3, double-sided and in full colour.
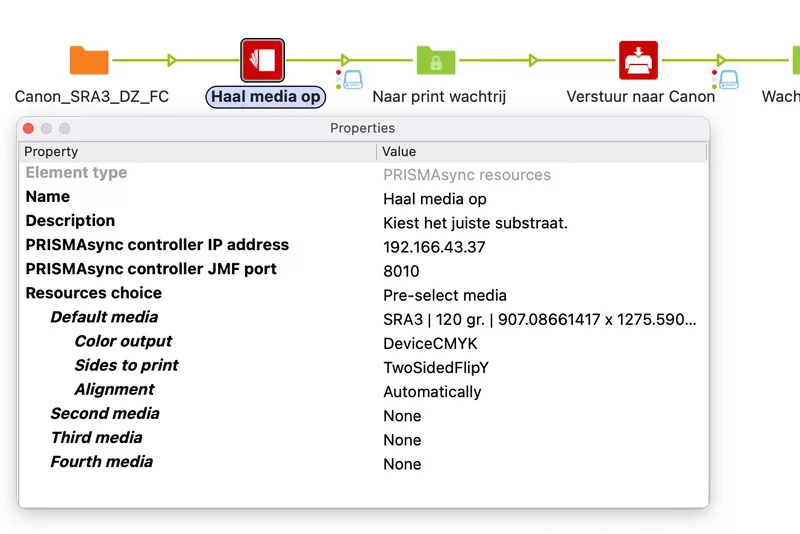
Step 3: Determine the media
Drag the "PRISMAsync resources" app into your flow and choose the right settings (replace the IP address with your own). The media is defined in PostScript points, the colours are DeviceCMYK or DeviceGray, and double-sided mirrored over the vertical axis is TwoSidedFlipY. One wrong character and the printer may no longer understand the job.
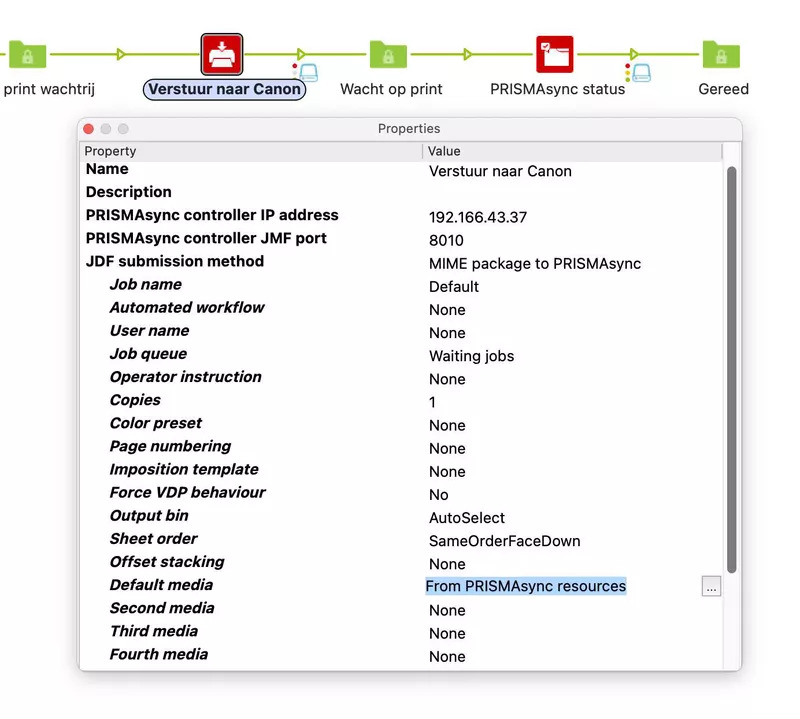
Step 4: Send to the printer
Drag the PRISMAsync status app into your workflow and choose "MIME package to PRISMAsync". A MIME package here is the PDF plus the JDF instruction plus the JMF query in one action. The printer immediately indicates whether it succeeded and returns a "QueueEntryId": a unique number per job. Note: set "Default media: From PRISMAsync resources" so the settings from the previous step are adopted automatically.
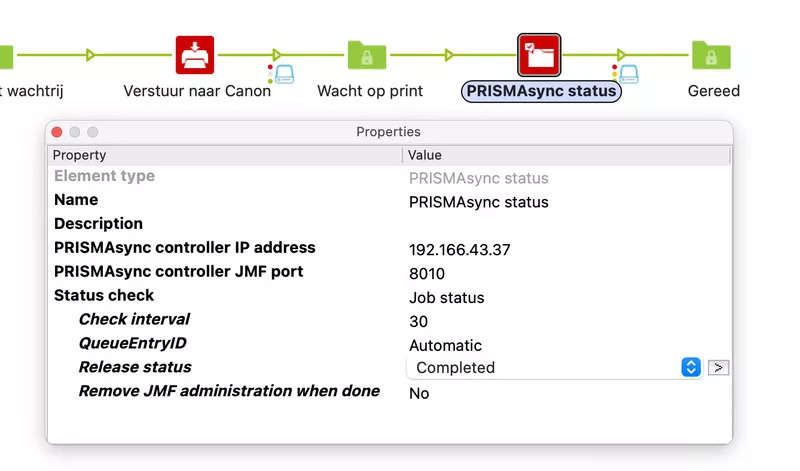
Step 5: Wait for the print
Finally, add the PRISMAsync status app. By setting the release status to "Completed", the job only proceeds to the next step once it is finished.
Difficult?
Was this difficult? Not really. But with other JDF-compatible devices your JDF instruction may look different. An HP Indigo presents its media catalogue differently, and an instruction for a cutting machine differs greatly from a combined print sheet or a nest to a Caldera Nexio. The software in this example is Enfocus Switch (base version). Hopefully this gives you better insight into how the JDF chain fits together.