What is an API?
An API (Application Programming Interface) is like the WhatsApp of apps: it sends messages, receives responses and enables interaction. Let us create a simple API.
The benefits
With a single API call, a partner can submit a job, file, XML or JSON. Simple and fast.
What do you need?
Switch now includes a "Switch Core Engine" with Enfocus PitStop Server. You can download a free demo and try it out yourself.
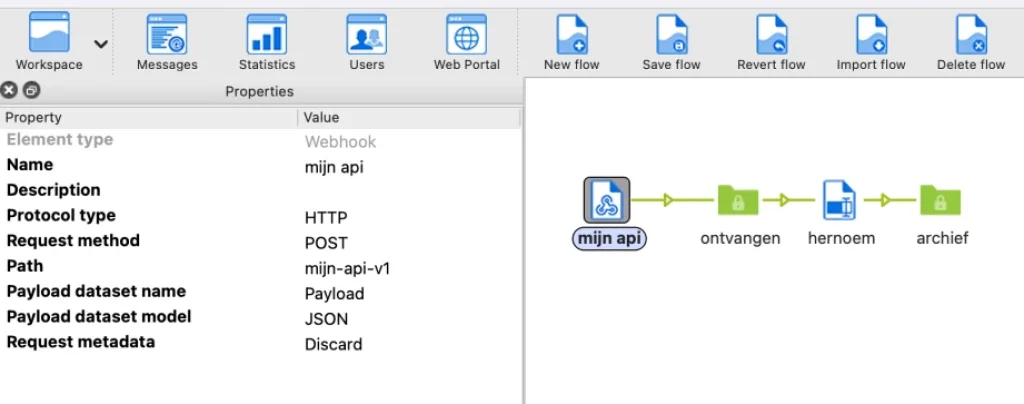
Step 1: Create your API
Using Switch, create a new flow "My first API", add a "Webhook" and connect it to a folder for incoming data. Fill in these parameters:
Name: "my api"
Path: "my-api-v1"
Ignore the rest for now.
Step 2: Test your API
Activate the flow and download the free app "Postman" to test APIs. Follow these steps:
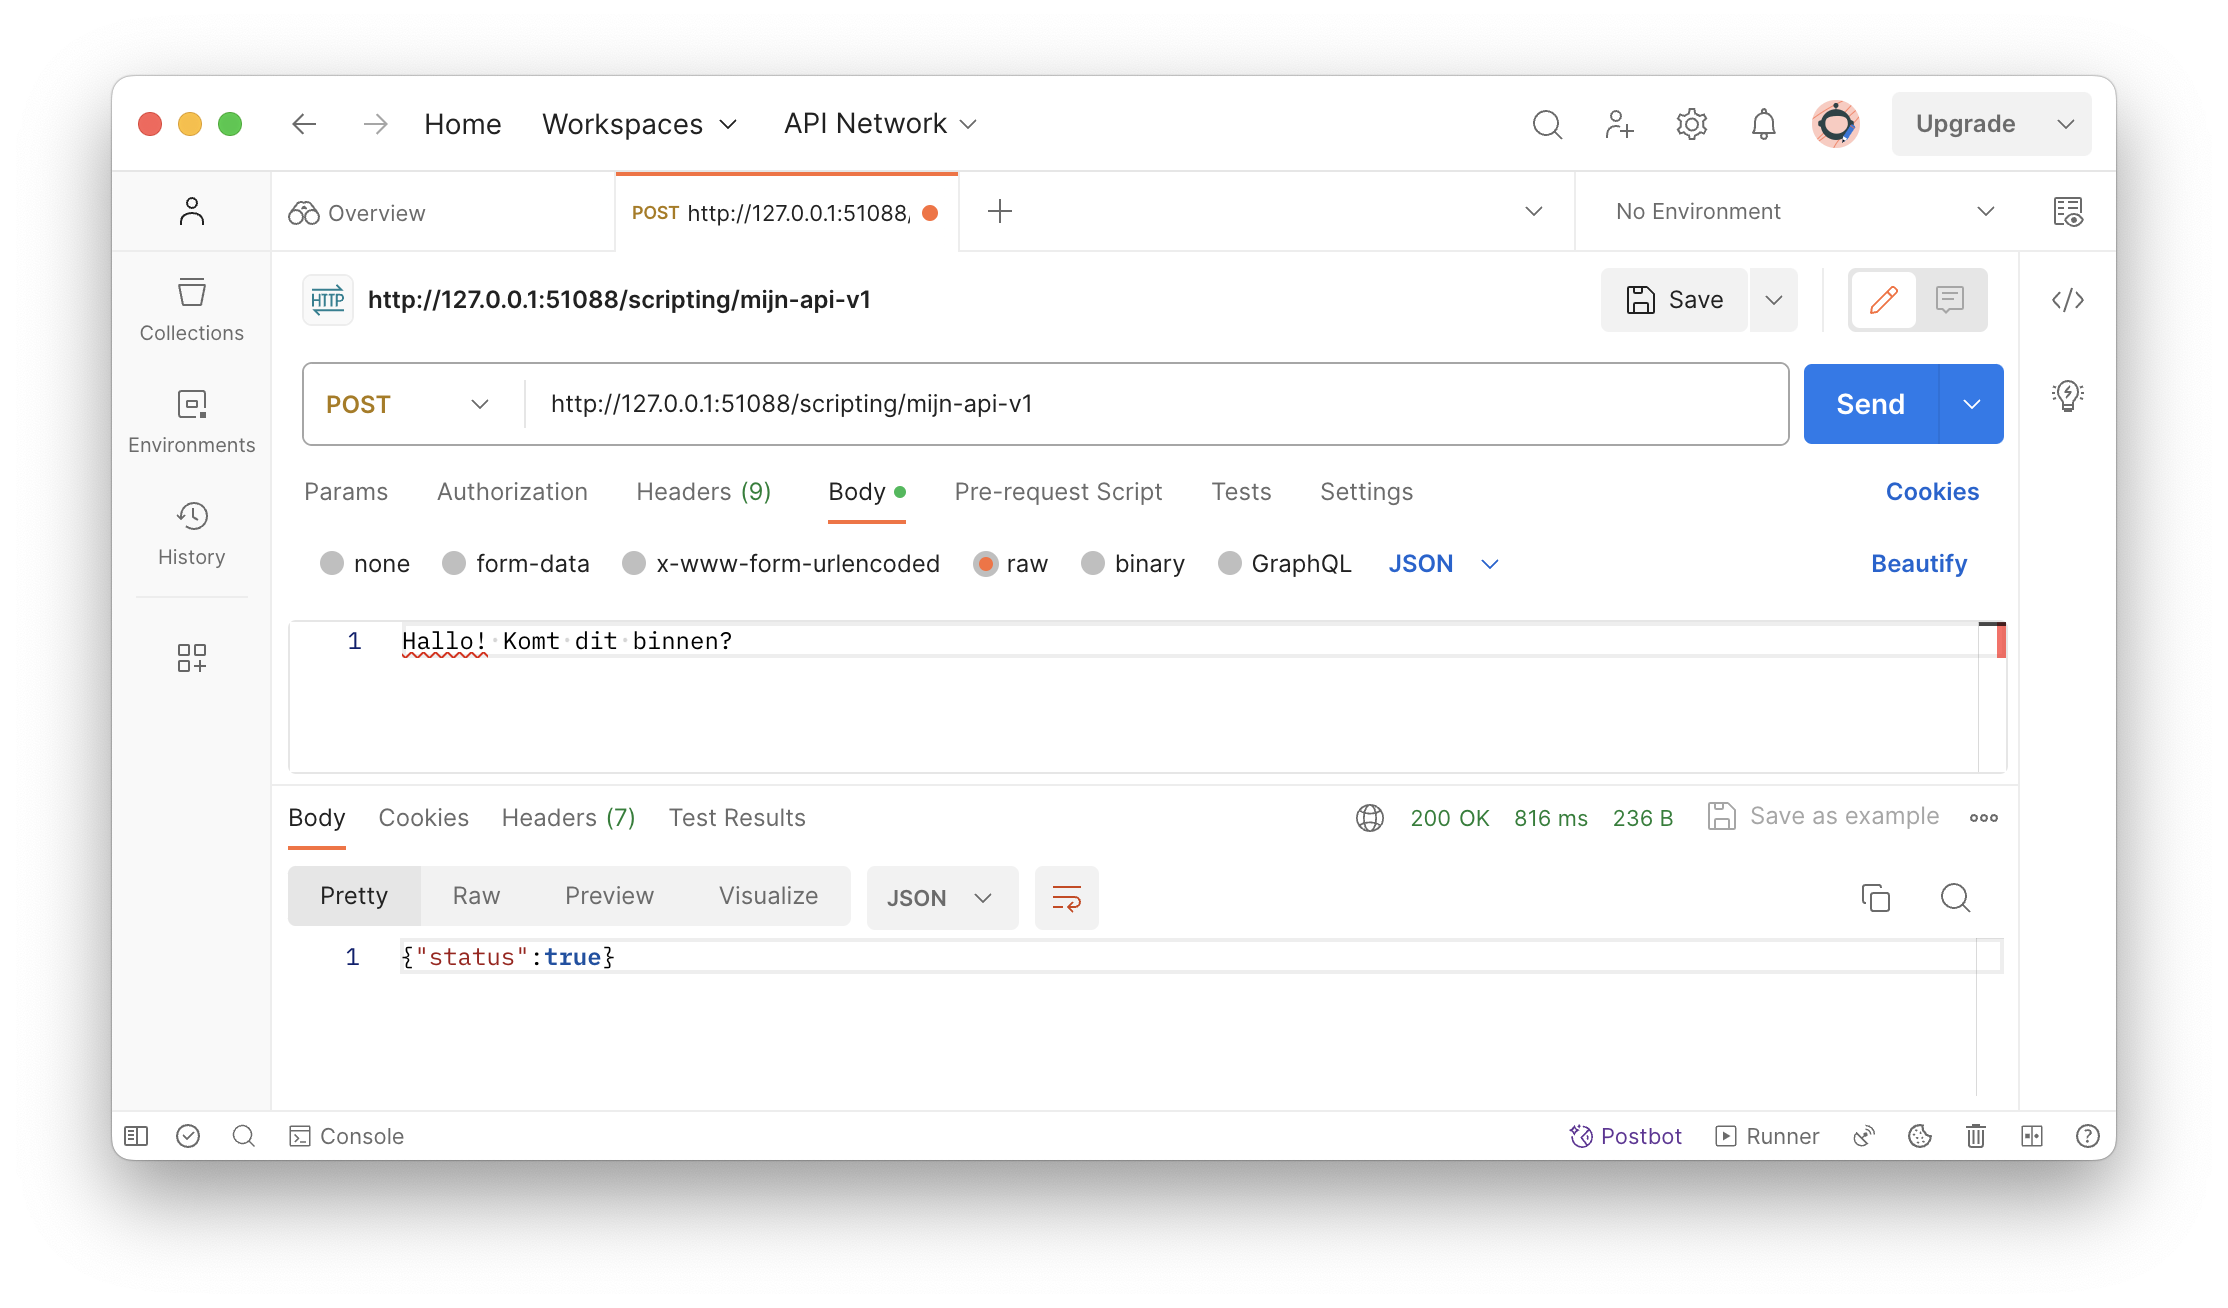
Start a new POST (for sending information).
Use the URL: http://127.0.0.1:51088/scripting/my-api-v1.
Choose "raw data" and select "text" for sending.
Type, for example, "Hello! Does this come through?".
Click "Send" and Postman should return { "status": true }, with a file in the "received" folder. Congratulations! You have just made your first API call.
Step 3: Share your API with your partners
It is important that your clients can reach it! Their external IP address must reach Switch. Look up your own external IP and use it as the new API URL for your partners, for example: http://149.143.60.165:51088/scripting/my-api-v1. Make sure port 51088 (or another) in the firewall/router points to the internal IP of the Switch computer.
Step 4: Expand your workflow
From here you can adjust the workflow as desired, for example saving the files with a timestamp and unique number:
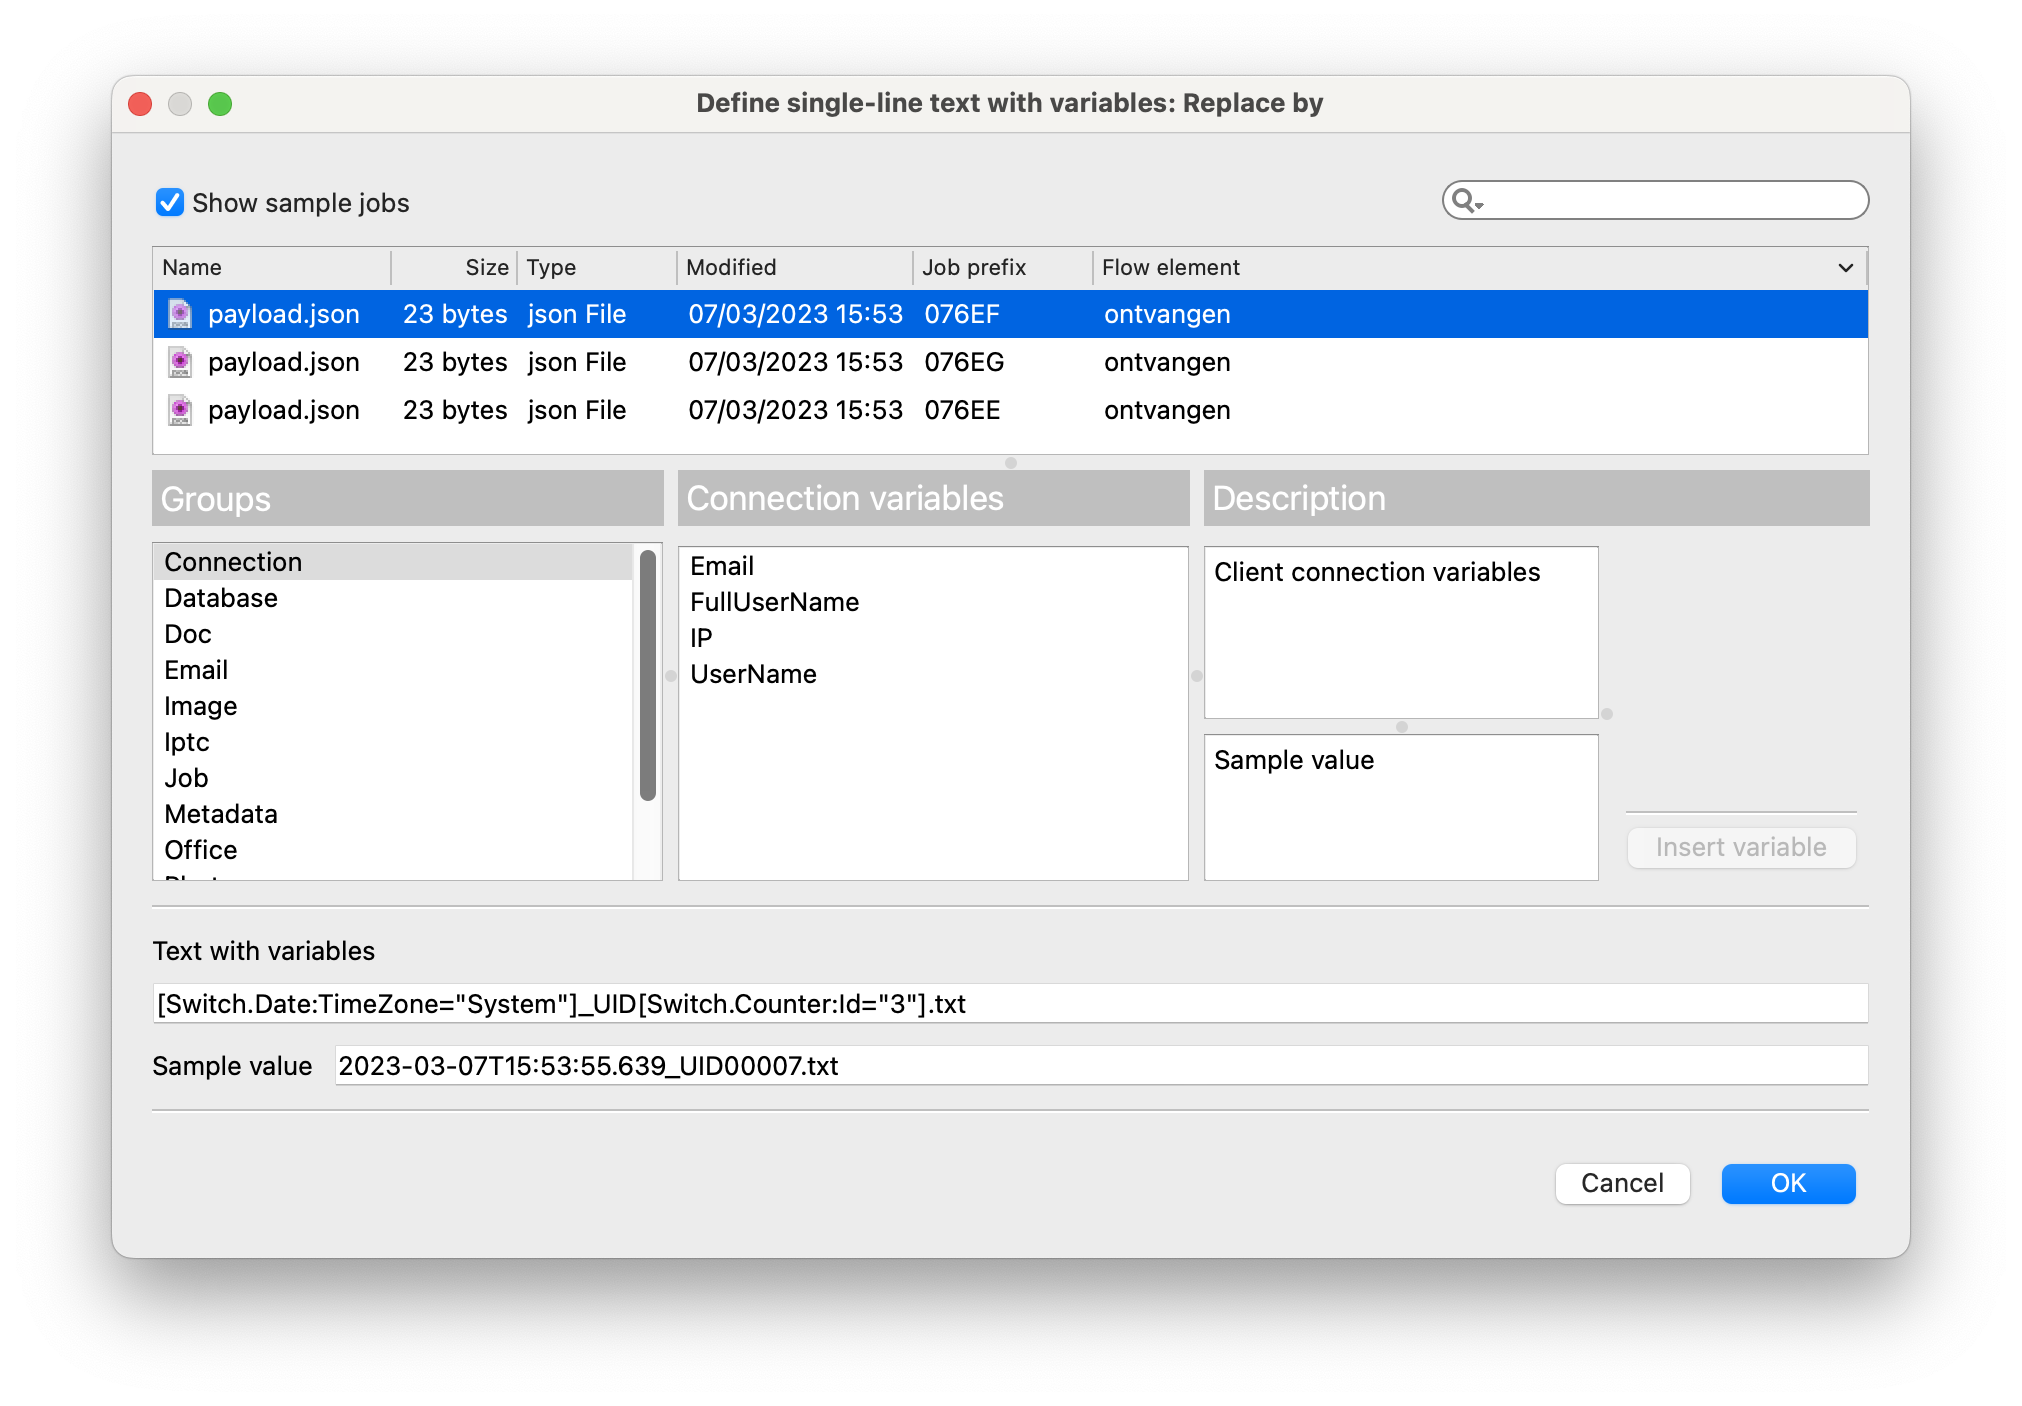
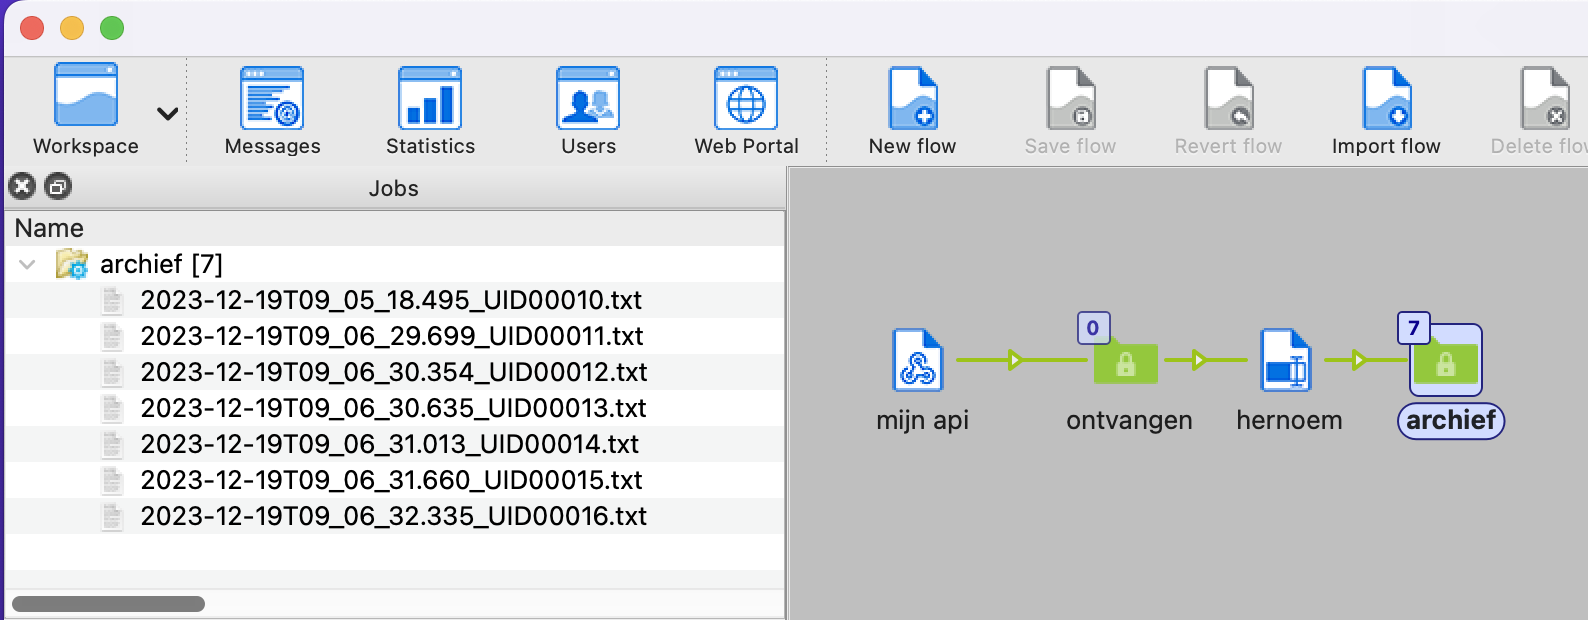
Add the "Rename" element and a folder.
Check "Replace" on the first action and choose "Act on: Complete filename".
For "Replace by" choose "Single-line text with variables defined" and fill in your desired values, such as a date, UID and counter.
That was quite a ride! Ready for a new way of collaborating? Give it a try now.